How to use and what mistakes should be avoided while using the Grout Float
- Share
- Issue Time
- Jan 18,2024
Summary
When it comes to tiling projects, achieving a professional-looking finish is essential. One of the tools that can help you achieve that flawless result is a grout float.
Introduction:
When it comes to tiling projects, achieving a professional-looking finish is essential. One of the tools that can help you achieve that flawless result is a grout float. In this article, we will explore what a grout float is and how to effectively use it to achieve beautiful and durable grout lines in your tiling projects.
What is a Grout Float?
A grout float is a handheld tool specifically designed for applying and smoothing grout into the joints between tiles. It typically consists of a rectangular or square-shaped base made of rubber, foam, or other similar materials. The base is attached to a handle that allows you to hold and maneuver the float easily. The primary purpose of a grout float is to evenly distribute grout into the gaps between tiles while also helping to level and compress the grout for a neat and professional finish.
Using a Grout Float:
Using a grout float may seem straightforward, but there are several essential steps to follow to ensure optimal results. Here's a step-by-step guide on how to use a grout float effectively:
Step 1: Prepare the Tiles:
Before applying grout, ensure that the tiles are firmly set and that any adhesive or mortar has fully cured. Clean the surface of the tiles and remove any debris or excess adhesive.
Step 2: Mix the Grout:
Follow the manufacturer's instructions to prepare the grout mixture. Mix it to a consistency similar to peanut butter. Let the grout mixture sit for a few minutes as recommended to activate its chemical properties.
Step 3: Load the Grout Float:
Once your grout mixture is ready, take a generous amount of grout with the grout float. Hold the float at a 45-degree angle and use the float's flat edge to scoop up the grout.
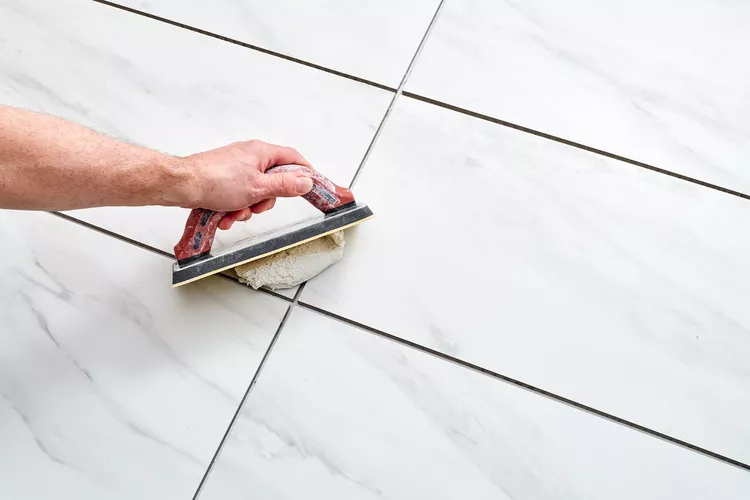
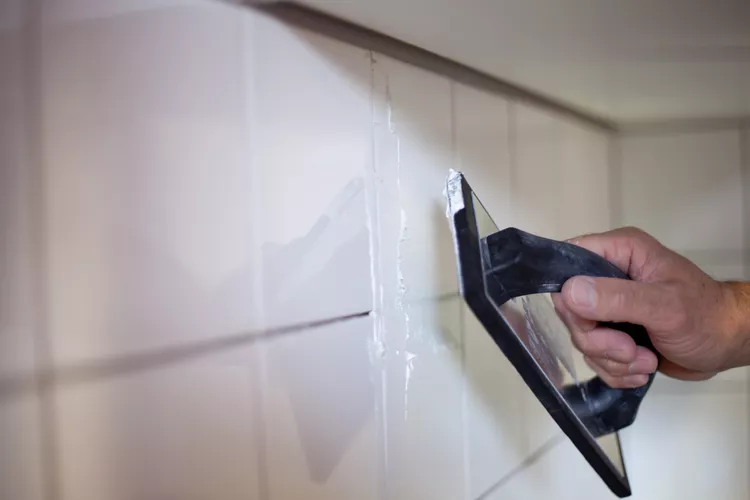
Step 4: Apply the Grout:
Starting from one corner of the tile surface, press the grout float onto the joints between the tiles. Hold the float at a 45-degree angle and use a sweeping motion to spread the grout diagonally across the tile joints. Ensure that the joints are filled, and the grout is evenly distributed.
Step 5: Remove Excess Grout:
After spreading the grout, hold the grout float at a steeper angle, almost perpendicular to the surface. Use the edge of the float to scrape off the excess grout from the tile surface. This will help create a smooth and level finish.
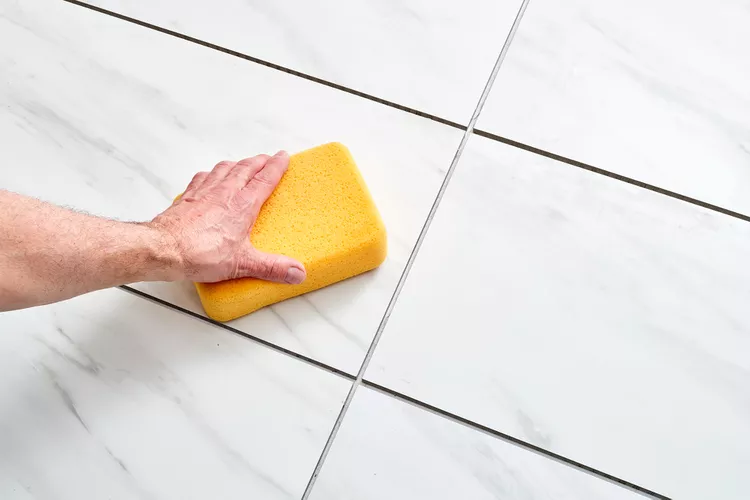
Step 6: Clean the Surface:
Once you have finished spreading and scraping off the excess grout, allow the grout to set for a few minutes, as recommended by the manufacturer. Then, using a slightly damp sponge, gently wipe the surface of the tiles to remove any remaining grout haze. Rinse the sponge regularly to avoid spreading grout residue.
Step 7: Final Touches:
After the grout has cured for the recommended time, typically 24 to 48 hours, use a dry cloth to buff the tiles and further remove any haze or residue.
Common mistakes to avoid when using a grout float
When using a grout float, it's important to be aware of common mistakes that can affect the quality of your grout lines and the overall appearance of your tiling project. By avoiding these mistakes, you can achieve a more professional and polished finish. Here are some common mistakes to watch out for:
1. Using too much water: Adding excessive water to the grout mixture can weaken its consistency and affect its ability to properly fill the gaps between tiles. Follow the manufacturer's instructions regarding the recommended water-to-grout ratio for the best results.
2. Applying grout too early: It's crucial to allow the adhesive or mortar to fully cure before applying the grout. If the tiles haven't set properly, the movement caused by spreading the grout can displace the tiles and create uneven grout lines.
3. Spreading grout too quickly: While it's essential to work efficiently, spreading the grout too quickly can result in uneven coverage and air pockets in the joints. Take your time to ensure that the grout is evenly distributed and properly fills the gaps.
4. Applying too much pressure: Excessive pressure while using the grout float can lead to the removal of too much grout from the joints, causing them to be shallow and weak. Apply gentle and consistent pressure to ensure that the grout is properly packed into the joints without removing excess.
5. Not cleaning the surface properly: Neglecting to clean the tile surface after grouting can result in grout haze or residue. Take the time to thoroughly clean the tiles using a slightly damp sponge, removing any excess grout before it dries and becomes difficult to remove.
6. Using a worn-out grout float: Over time, the rubber or foam base of a grout float can wear down, affecting its ability to distribute and smooth the grout effectively. Replace your grout float if you notice signs of wear or damage to ensure optimal performance.
7. Failing to protect adjacent surfaces: Grouting can be a messy process, and it's important to protect adjacent surfaces, such as countertops or flooring, from accidental spills or splatters. Use masking tape or plastic sheeting to cover and protect these areas.
8. Not sealing the grout: After the grout has fully cured, it's crucial to apply a grout sealer to protect it from stains, moisture, and discoloration. Skipping this step can lead to grout deterioration over time.
By avoiding these common mistakes, you can enhance the quality of your grout lines and achieve a professional-looking finish in your tiling projects. Take your time, follow the recommended guidelines, and pay attention to detail for the best results.
Conclusion:
A grout float is an indispensable tool for achieving professional-looking grout lines in your tiling projects. By following the steps outlined above, you can ensure that your grout is evenly distributed, neatly finished, and provides a durable and aesthetically pleasing result. Remember to always follow the manufacturer's instructions for both the grout and the grout float, and take your time to achieve the best possible outcome. With practice and patience, you'll be able to master the art of using a grout float and elevate the quality of your tiling projects.


