Troubleshooting Common Tile Leveling System Problems
- Share
- Issue Time
- Jan 23,2024
Summary
Tile leveling systems play a vital role in achieving a perfect tile installation. Read on to learn more about common problems faced with tile leveling systems and effective troubleshooting methods.
When starting a tile installation project, the accuracy and beauty of the result often depend on one key tool: a tile leveling tool. These ingenious systems are becoming an indispensable requirement in the ceramic tile sector and play a key role in achieving a flawless surface.
Whether you're a seasoned professional or a DIY enthusiast, the importance of perfectly flat tiles can't be overstated. It's not just about looks; It's about longevity and quality.
In this blog, we'll dive into troubleshooting common problems with tile leveling systems, a guide dedicated to uncovering the mysteries and overcoming the obstacles associated with these systems.
Common Problems with Tile Leveling Systems and Their Troubleshooting
Tackling tile installation can be challenging, and understanding the nuances of using a tile leveling system is key to achieving a perfect finish.
In this section, we'll look at some common problems that arise when using tile leveling systems and provide practical solutions for resolving them.
Problem 1: Not Fully Understanding the Functions of the Tile Leveling System
One of the most common misconceptions about tile leveling systems is their purpose. Many DIYers and even some professionals mistakenly believe that these systems can determine the slope of the floor or ensure that all sides of the tiles line up in one plane.
However, the primary function of a tile leveling system is to align adjacent tiles on a flat surface and act as an anti-slip tool, not to assess the level or slope of the entire floor itself.
Reason
Professionals often misunderstand this because they lack understanding of what the tile leveling system is designed to do. It's easy to confuse their purpose with that of other leveling tools.
Solution
Tool Education: The first step is to understand the difference between a tile leveling system and a leveling tool like a spirit level or bubble level. A spirit level is used to determine whether a surface is horizontal or vertical. This tool is essential for preparing the surface before starting to lay the tiles.
Proper Surface Preparation: Before you begin installing tile, make sure you apply the appropriate amount of adhesive and prepare the floor properly. Use a level to check the flatness of the area.
Problem 2: Broken Clip or Wedge
Transitioning from understanding the functionality of a tile leveling system, another common problem that often frustrates novices and experts alike is the breaking of clamps or wedges. This Problem can derail a tile project from going smoothly and affect the final result. Let's take a deeper look at why this happens and how to prevent it.
Reason
Excessive Force: The most common cause of breakage is excessive force when inserting a wedge into a clamp or tightening a screw in a leveling system. It's a delicate balance; too little force and the tile won't level properly, too much force and you risk damaging the tool.
Defective Product: Sometimes, the problem may not lie with the app but with the product itself. Low-quality clamps and wedges may break easily and be unable to withstand the tension required to effectively smooth tiles.
Solution
Master Technique: The key is to apply the right amount of force. When inserting wedges or tightening screws, do so gradually. Feel the tension and stop when you feel resistance, aligning the tiles. It's not about muscle strength; It's about skill and precision.
Choose Quality Products: Invest in a quality tile leveling system. Keep in mind that cheaper isn't always better, especially when it comes to tools that need to withstand a certain amount of stress.
Practice Makes Perfect: If you're new to using a tile leveling system, practice on some spare tiles before starting your main project. This hands-on experience will give you an idea of the proper amount of force required and help you become more familiar with these tools.
Problem 3: Using the Same Tile Leveling Clamps for Different Tile Formats and Thicknesses
On the subject of proper technique and tool selection, another challenge often encountered in tile installation is the use of inappropriate tile leveling clamp sizes for different tile formats and thicknesses. This problem can compromise the integrity of your tile installation and cause frustrating frustration.
Reason
One-size-fits-all mentality: A common mistake is assuming that one size of tile leveling clamp will fit all types of tiles. Ceramic tiles come in a variety of formats and thicknesses, and each type requires specific leveling clamps. Using the same clamp for different types of tiles is like using a hammer for every task in your toolbox - it simply won't work for every situation.
Solution
Follow Manufacturer's Recommendations: Before starting a tile project, refer to the recommendations provided by the manufacturer of your tile leveling system. They often provide specific guidelines for different tile formats and thicknesses. Following these guidelines will ensure that your clamps are compatible with your tile type and can support its weight and size without breaking.
Choose the Right Clamp Size: Make sure the clamp you choose is suitable for the thickness and weight of your tile. For example, large-format tiles often require stronger, more robust clamps to withstand the additional pressure.
Check Clip Exposure: This is especially important with wedge tile leveling systems, you need to make sure the hole diameter of the wedge tile leveling clip is sufficiently exposed to the surface to allow for easy insertion of the wedge. If the clamp height is too small for thicker tiles, you may find it difficult to insert the wedges, rendering the leveling system ineffective.
Problem 4: Removing the Tile Leveling System
As we continue to address common tile challenges, another key aspect to note is the removal of tile leveling systems. While this step may seem simple, it's fraught with potential mistakes that could undo all your hard work.
Reason
Improper removal techniques: The methods used are the main cause of problems during the removal of tile leveling systems. Many people may take a "break first and then strengthen" approach, using excessive force or incorrect angles. This forceful method will not only damage the leveling system but also cause the newly laid tiles to shift or become damaged. It's a delicate process—one wrong move and you might find yourself taking a step back from your tile project.
Solution
Use a Rubber Hammer: The key to safely removing a tile leveling system is using the right tool – a rubber hammer. This allows enough control to break the clip or wedge without damaging the tile.
Tap along the grout line: When using a rubber mallet, aim to tap along the grout line, not perpendicular to it. This direction of force helps effectively break the weakest point of the leveling system (usually where the clamps make contact with the tile surface) without putting undue stress on the tile.
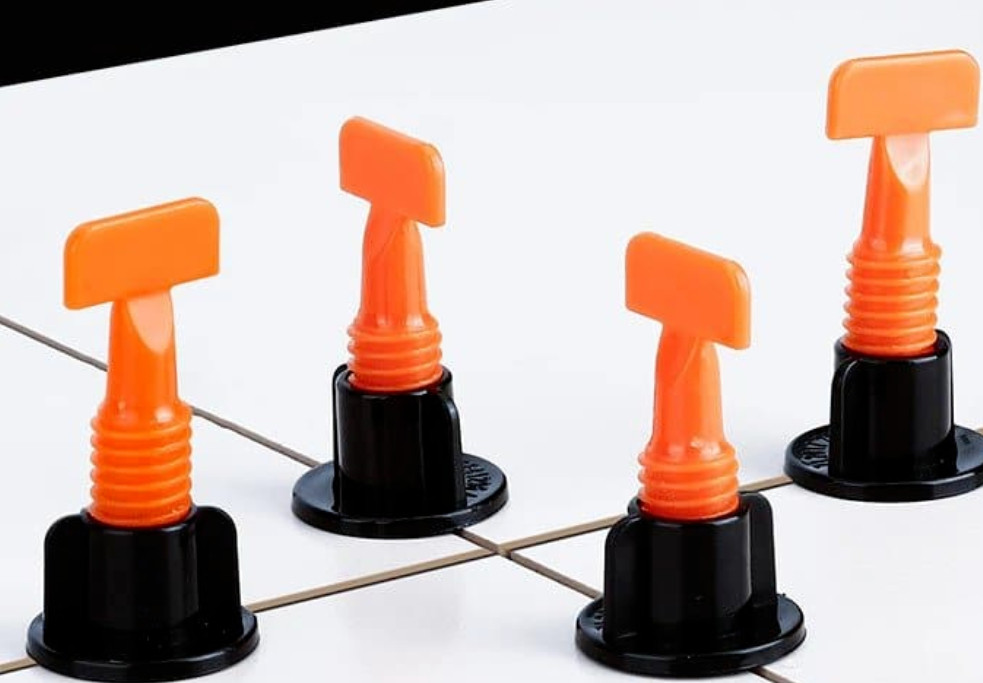
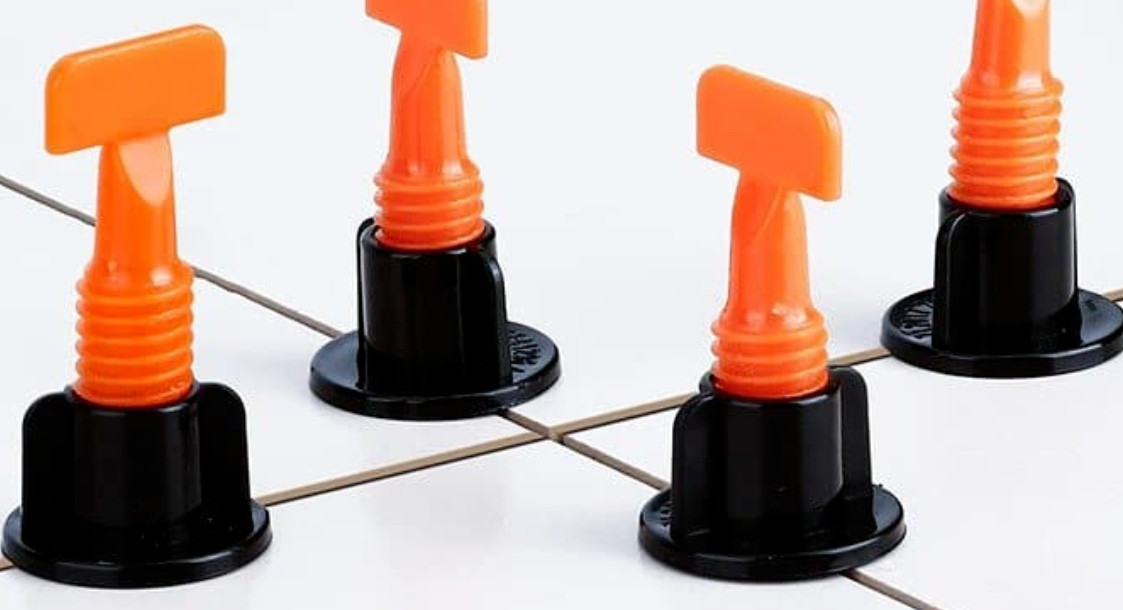
Problem 5: Broken T-Pins of a Reusable T-Pin Tile Leveling System
Exploring further the intricacies of using tile leveling systems for tile installation, reusable T-pin tile leveling systems often present one specific problem - breaking the T-pin. This problem is unique to this type of system and can be particularly frustrating because it not only hinders the efficiency of the leveling process but also affects the reusability of the system, the advantage of a reusable tile leveling system.
Reason
Improper T-pin Removal Technique: The most common cause of T-pin breakage in reusable T-pin tile leveling systems is failure to turn the T-pin along the grout line before removal. Many users make the mistake of hitting the T-pin directly with a rubber mallet without adjusting its direction. This oversight can put undue stress on the T-pin, causing it to break.
Solution
Proper T-pin Orientation: Before attempting to remove the T-pin, make sure it is oriented correctly. The T-pin should be turned along the grout line by turning the T-screw above the surface. This alignment reduces resistance and stress on the pins during removal.
Tap Lightly with a Rubber Mallet: Once the T-pin is positioned correctly, tap it lightly with a rubber mallet. The goal is to get the pin out of its position without applying excessive force.
Conclusion: Master the Art of Tile Leveling with the TILER Tile Leveling System
As we wrap up this comprehensive guide to common Problems with tile leveling systems, it's clear that there are nuances and specific challenges involved in perfecting a tile installation. From understanding the basic purpose of a tile leveling system to mastering various types of removal techniques, each step is critical to achieving a perfectly flat and visually appealing tile surface.
As a professional custom tile tools manufacturer, our tile leveling systems provide professionals and DIYers alike with a tool to ensure a perfect, even surface. The TILER tile leveling system stands out for its user-friendly design and precision for seamless tile installation. Its components, including clamps and wedges, work in harmony to eliminate common problems like uneven tiles and lip cracks. The TILER tile leveling system is engineered to accommodate a variety of tile types and sizes, making it a versatile solution for a variety of projects. If you want to order ceramic tile tools, please contact us.
At the heart of the TILER tile leveling system's effectiveness is its attention to detail in solving common tile leveling challenges. During installation, the clamps hold the tiles securely in place, preventing any movement that could cause an uneven surface. Wedges play a key role in adjusting the tiles to the desired level, with a level of precision that sets the TILER tile leveling system apart from traditional methods. Whether you're a seasoned professional or a DIY enthusiast, mastering the art of tile leveling will become a seamless experience with the TILER tile leveling system. Say goodbye to the worries of cracked and uneven tiles, TILER makes it easy to achieve a perfectly flat tile surface.
TILER is committed to providing installers with accurate, efficient, innovative and professional tile tools. Our six product categories cover all the necessary tools for tile decoration, including tile cutters, large format panel systems, tile handling and laying tools, tile leveling tools, grouting and cleaning tools and other tile tools. TILER is committed to creating a comprehensive category in the field of ceramic tile installation, covering all categories from preparation, cutting, drilling, installation to grouting, cleaning, etc., covering all aspects of your work.