A Step-by-Step Guide on How to Remove Tiles from the Wall
- Share
- Issue Time
- Feb 18,2024
Summary
Learn the step-by-step process with intriguing stories, as we bid farewell to old tiles and embrace a fresh new look.
Tiles have long been a symbol of elegance and beauty in interior design. However, there comes a time when you may need to bid farewell to your old tiles and embrace a new look. Whether you're renovating your bathroom, kitchen, or any other tiled space, knowing how to remove tiles from the wall is essential. In this comprehensive guide, we will not only walk you through the step-by-step process of tile removal, but we will also share some interesting stories along the way. So, please put on your safety goggles, grab your tools, and let's get started!
The Backstory
Before we dive into the nitty-gritty of tile removal, let's take a moment to appreciate the historical significance of tiles. Tiles have been used for centuries, adorning the walls of palaces, temples, and homes alike. From ancient civilizations to modern times, the art of tiling has evolved, and today, we have an array of designs and materials to choose from.
The Tools of the Trade
Every craftsman needs the right tools to complete a job with finesse. When it comes to tile removal, you'll need the following essential tools:
1. Safety goggles and gloves: Protect your eyes and hands from flying debris and sharp edges.
2. Hammer: A 16-ounce hammer will suffice for most tile removal tasks.
3. Cold chisel: Use a cold chisel with a wide blade to break the tile and remove it from the wall.
4. Pry bar: A pry bar comes in handy for prying away larger pieces of tile.
5. Putty knife: Use a putty knife to remove any adhesive or grout residue left on the wall.
Preparing for Battle
Now that your tools are ready, it's time to prepare for the battlefield. Follow these steps:
1. Clear the area: Remove any furniture or fixtures near the tiles to create a safe and clutter-free workspace.
2. Cover surfaces: Protect countertops and floors from falling debris by covering them with drop cloths or old sheets.
3. Turn off electricity: If you're working in a bathroom or kitchen, switch off the electrical power to prevent accidents.
The Dance of Destruction
With your safety gear on and the preparation complete, it's time for the main event – tile removal! Follow these steps:
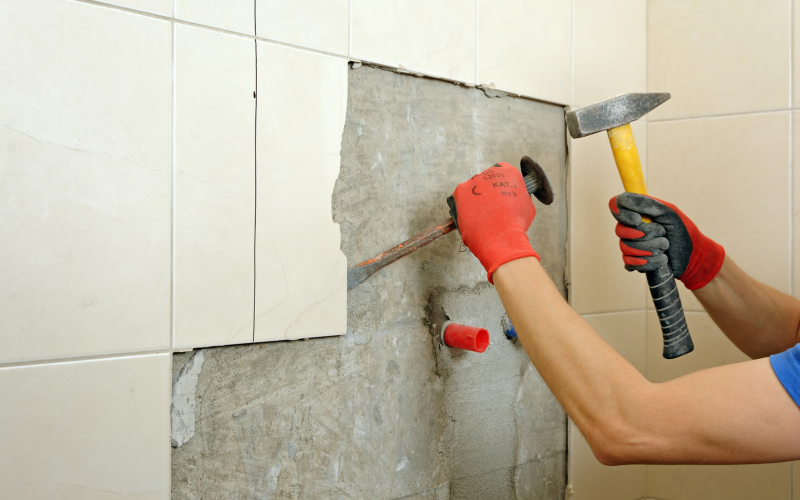
1. Start at an edge: Look for a loose tile or a grout line near the edge of the wall. This will be your starting point.
2. Break the tile: Position the cold chisel at a slight angle and tap it gently with the hammer. Gradually increase the force until the tile cracks.
3. Remove the tile: Use the pry bar to lift the broken tile away from the wall. If necessary, use the putty knife to scrape off any remaining adhesive or grout.
4. Repeat the process: Continue breaking and removing tiles systematically, working your way across the wall. Take breaks as needed and stay mindful of your safety.
The Aftermath
Congratulations! You've successfully removed all the tiles from the wall. However, before you proceed with the next steps of your tiling project, take care of the aftermath:
1. Clean the wall: Use a vacuum cleaner or a broom to remove any loose debris from the wall. Wipe it down with a damp cloth to ensure a clean surface.
2. Repair any damage: Assess the condition of the wall. If there are any holes or cracks, patch them up with a spackling compound or joint compound. Sand the area smooth once it dries.
Removing tiles from a wall may seem like a daunting task, but armed with the right tools, knowledge, and a touch of appreciation for the stories behind the tiles, you can achieve remarkable results. Remember to prioritize safety, take your time, and enjoy the journey of transforming your space. So, go forth, unleash your inner tile artist, and create a canvas deserving of admiration!
Please browse our website for relevant products:
https://seller.tradew.com/ManageProductsB2C.aspx?term=SEFNTUVS