Grout Float Maintenance 101: Extending the Life of Your Tools
- Share
- Issue Time
- Feb 27,2024
Summary
Grout floats require proper maintenance to ensure their longevity and optimal performance. In this guide, we delve into the basics of grout float maintenance, read on to learn more.
A grout trowel is an important tool in the tile and flooring world, helping to seamlessly apply grout to a polished surface. However, like any tool, a grout float requires proper maintenance to ensure its longevity and optimal performance. In this guide, we delve into the basics of grout float maintenance and explore effective strategies to extend the life of these indispensable tools.
Understand the Composition of Grout Floats
A grout float is an essential tool for tile and flooring projects, consisting of three basic components that are critical to its functionality and efficiency. The handle serves as a grip and control point allowing for precise maneuvering during the grouting process. At the same time, the base acts as a foundation support to evenly distribute the cement slurry on the surface to ensure a uniform surface. Finally, the grout application surface is usually made of rubber or foam and plays a key role in distributing grout seamlessly and smoothing the surface for a polished look.
Tips for Cleaning and Maintaining Grout Floats
Cleaning and maintaining your grout float is critical to ensuring its longevity and optimal performance throughout your tile project. Here are some tips to help you keep your grout float in top condition:
Rinse After Each Use: After using the grout float, rinse it thoroughly with clean water to remove any grout residue or debris. This prevents buildup and maintains the integrity of the float material.
Use a Mild Detergent: For a deeper clean, use a mild detergent or dish soap diluted in water. Avoid using harsh chemicals or abrasive cleaners as they can damage the surface of the float.
Avoid Soaking: When cleaning, avoid soaking the grout float for extended periods. Prolonged exposure to water can weaken the material and compromise the effectiveness of the float.
Scrub Gently: If there are stubborn stains or grout buildup, use a soft-bristled brush or sponge to gently scrub the surface of the float. Avoid using abrasive materials that may scratch or damage the float.
Dry Thoroughly: After cleaning, make sure the grout float is completely dry before storing it. Moisture promotes mold growth and deterioration, so store your float in a dry, well-ventilated area.
Regular Inspections: Check your grout float regularly for any signs of damage or wear. Look for cracks, tears, or loose parts that may affect its performance.
Proper Storage: Store grout floats in designated areas away from direct sunlight and moisture. Hanging the float or storing it on a flat surface can help maintain its shape and prevent deformation.
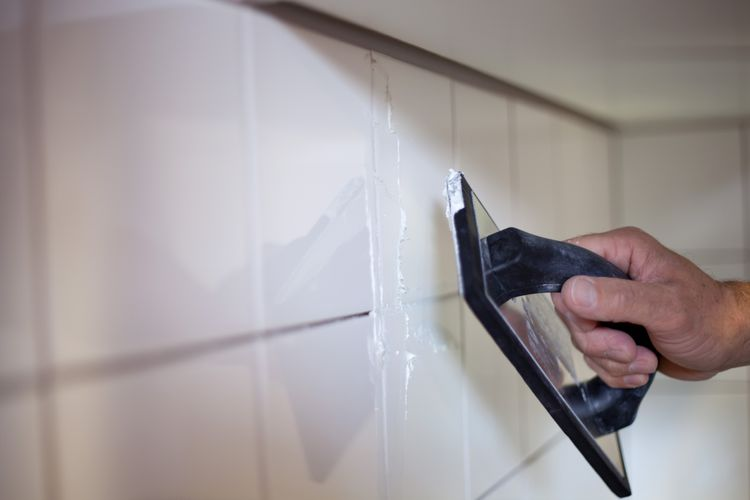
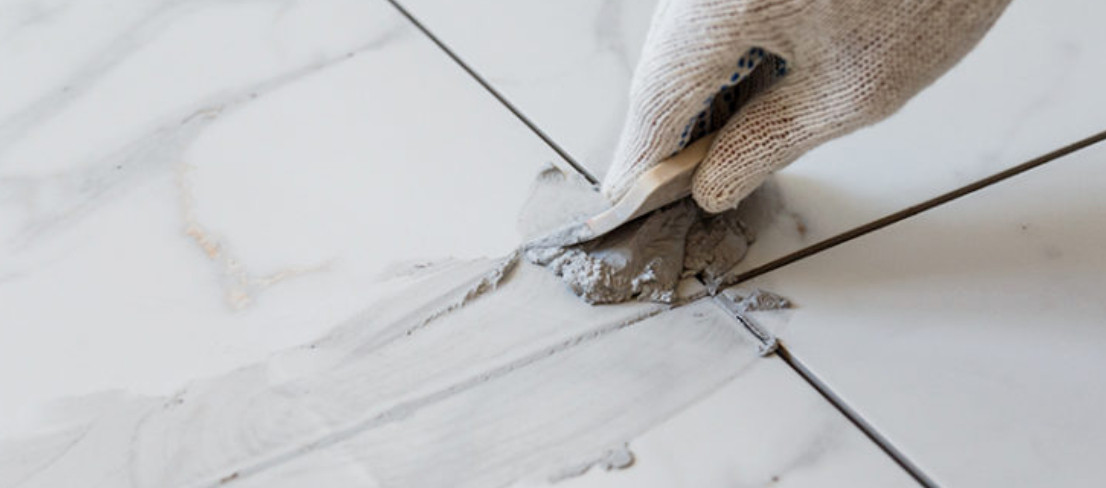
How to Repair Cracks, Gaps, or Chips in Grout
Now that you've completed the steps to maintain your tile grout, you must repair the material to make the floor look more uniform.
Remove Damaged or Protruding Grout
Using a putty knife or grout saw, start scraping away old grout that is cracked or needs to be replaced. The mess created when vacuuming or cleaning tile joints. This prepares the floor for new grout.
Fill Joints with New Grout
Using a grout float, press the mixture into the tiles to begin filling the gaps. You have to be generous when applying this mixture to ensure it fully penetrates the joints and fills the gaps. Don’t worry if grout stains the surface of your tiles. You can clean it later.
Remove Excess Grout Mixture
Once you've filled the gaps with grout, you'll want to wipe and scrape off any excess mixture so it doesn't stick to the tiles. Remove the previous float and gently scrape across the joint to pick up any remaining grout. This will create a flush line with the rest of the floor.
Seal New Grout
The grout must be allowed to dry for one to two days before the sealer is applied. You need to seal this area of the floor because the more you walk on the surface, the more likely it is to develop more cracks and chips. Sealants protect this material, preventing water from entering the pores and preventing the growth of mold and bacteria.
Tile floors in your home are beautiful and luxurious, but to maintain the look, you must know how to clean and repair grout. Do not neglect this part of the floor or you may cause more serious damage. Make sure your grout is regularly maintained and cleaned at least twice a year.
In Conclusion
Effective maintenance is the cornerstone of extending the life of your grout float and ensuring consistent, high-quality results on your tile projects. By understanding the components of a grout float, recognizing signs of wear, and implementing proper cleaning and repair practices, you can extend the availability of your tools and improve your workmanship. If you are looking for a reliable grout float or other tile tool manufacturer, please contact us.
TILER grout floats stand out for their construction made of durable rubber material, ensuring longevity and reliability in a variety of tile applications. Designed with professional-grade performance in mind, these floats feature a double-edged design that simplifies the grout application process. Whether you are undertaking dry lining or plastering tasks, the versatility of TILER grout floats comes into play, providing a seamless transition between different project requirements. Its ergonomic design and efficient functionality make it an indispensable tool for DIY enthusiasts and experienced tile installers alike. Able to deliver consistent results and enhance the overall tiling experience, TILER grout floats become a great addition to any tool kit, guaranteeing reliability and precision every time.
Founded in 1996, TILER is a professional custom tile tool manufacturer in China. With a strong commitment to excellence, TILER is committed to developing a full range of products to meet the diverse needs of ceramic tile installation. From initial preparation to meticulous cutting, precise drilling, seamless installation, and meticulous grouting and cleaning, TILER's product lineup covers the entire tile installation process. TILER's unwavering focus on innovation and quality craftsmanship ensures that professionals and DIY enthusiasts alike have access to the necessary tools and equipment to achieve outstanding results in every aspect of their work. By offering complete solutions, TILER enables individuals to tackle any project with confidence and precision, solidifying its position as a trusted partner in the ceramic tile industry.
Frequently Asked Questions
How Often Should I Clean My Grout Float? It is recommended to clean the grout float after each use to prevent grout build-up and maintain its effectiveness.
Can I Use Bleach to Clean the Grout Float? Avoid using bleach or harsh chemicals as they can damage the surface of the grout float. Stick to mild detergent and water for cleaning.
What Should I Do if the Grout Float Handle Is Loose? If the handle is loose, tighten any screws or bolts that may be loose. If the problem persists, consider replacing the handle to ensure proper grip and control.
Is It Necessary to Store My Grout Float in a Specific Way? Store the grout float in a dry, ventilated place away from direct sunlight to prevent mold growth and extend its life.
How Do I Tell if My Grout Float Needs Replacing? Signs such as visible cracks, irreparable damage to the handle, or severe deterioration of the grout surface indicate the need for replacement.

The TILER Rubber Grout Float A42104 is used for filling and smoothing grout lines between tiles during tile installation.

Rubber Grout Float A42102 Double Color Soft Handle |Ergonomic Design |Suitable for Grout Application
The TILER EVA Grout Float A42101 is used for filling and smoothing grout lines between tiles during tile installation.