Best Practices for Preparing a Surface Before Tile Installation
- Share
- Issue Time
- Mar 11,2024
Summary
Best Practices for Preparing a Surface Before Tile Installation" provides crucial guidelines for a successful tile installation.
When it comes to tile installation, proper surface preparation is crucial for achieving a long-lasting and professional result. Preparing the surface ensures that the tile adheres securely, prevents future problems such as cracks or loose tiles, and allows for a smooth and visually appealing finish. In this article, we will explore the best practices for preparing a surface before tile installation, covering everything from assessing the substrate to ensuring proper cleanliness. So let's dive in!
1. Assessing the Substrate
Before starting any tile installation project, it's important to assess the substrate, which is the surface on which the tiles will be installed. Whether it's a concrete slab, plywood, or an existing floor, the substrate must be structurally sound, stable, and free from any issues that could affect the tile installation. Here are some key considerations:
1.1 Checking for Structural Stability
Ensure that the substrate is stable and free from any structural issues that could cause movement or cracking. Look for signs of cracks, unevenness, or sagging. If significant problems are detected, consult a professional to address the structural issues before proceeding with the tile installation.
1.2 Assessing Moisture Levels
Check the moisture levels of the substrate, especially for areas prone to moisture such as bathrooms or kitchens. Excessive moisture can compromise the tile installation and lead to long-term damage. Perform a moisture test using a moisture meter or consult a professional to determine if any moisture mitigation measures are required.
2. Surface Preparation Techniques
Once the substrate assessment is complete, it's time to prepare the surface for tile installation. Here are some essential techniques to follow:
2.1 Cleaning the Surface
Thoroughly clean the surface to remove any dirt, dust, grease, or debris. Use a broom, vacuum cleaner, or a damp cloth to ensure a clean and dust-free surface. This step helps the tile adhesive bond properly to the substrate.
2.2 Repairing Imperfections
Inspect the surface for any imperfections such as cracks, chips, or unevenness. Repair minor cracks using a suitable crack filler or patching compound. For larger cracks or significant surface irregularities, consider consulting a professional to ensure proper repairs are made.
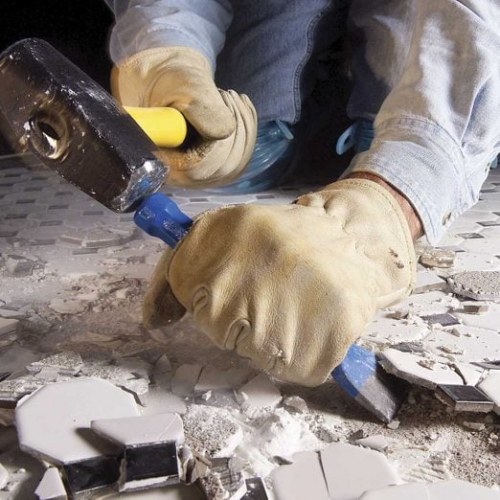
2.3 Removing Existing Flooring
If you're installing tiles over an existing floor, it's essential to remove any old flooring material, including carpet, vinyl, or laminate. Ensure that the surface is clean, level, and free from any residue that could affect the new tile installation.
3. Surface Priming and Waterproofing
Surface priming and waterproofing are additional steps that can enhance the longevity and performance of your tile installation. While not always necessary, they can be beneficial in certain situations:
3.1 Priming the Surface
Priming the surface with a suitable primer can improve the bond between the substrate and the tile adhesive. It helps seal porous surfaces, reduces dusting, and enhances the overall adhesion.
3.2 Waterproofing
In areas prone to moisture, such as showers or wet rooms, applying a waterproofing membrane is essential. This step prevents water from penetrating the substrate, protecting it from potential damage.
4. Leveling the Surface
A level surface is crucial for a professional-looking tile installation. If the substrate has significant unevenness or slopes, it's important to level it before proceeding. Here are some options for leveling the surface:
4.1 Self-Leveling Underlayment
Self-leveling underlayment is a popular choice for correcting minor surface imperfections and achieving a level substrate. Follow the manufacturer's instructions for proper mixing and application. Be sure to allow sufficient drying time before proceeding with tile installation.
4.2 Using Mortar Bed
In some cases, a mortar bed can be utilized to level the surface. This method is commonly used in large areas or when dealing with substantial unevenness. It involves applying a layer of mortar to create a level surface. Consult a professional or reference industry guidelines for proper mortar bed installation techniques.
Conclusion
Proper surface preparation is vital for a successful tile installation. By following these best practices, you can ensure a solid foundation, maximize the lifespan of your tile installation, and achieve a professional and visually pleasing result. Remember to assess the substrate, clean and repair the surface, consider priming and waterproofing when necessary, and level the surface as needed. By investing time and effort in surface preparation, you'll set yourself up for a beautiful and long-lasting tile installation.
FAQs
1. Do I need to prime the surface before tile installation?
Priming the surface is not always necessary, but it can enhance the bond between the substrate and the tile adhesive. It seals porous surfaces and improves adhesion, especially on challenging substrates. Consider priming if you want to ensure the best possible bond and longevity for your tile installation.
2. Can I install tiles over an existing floor?
Yes, you can install tiles over an existing floor. However, it's important to ensure that the existing floor is clean, level, and free from any residue that could affect the new tile installation. Remove any old flooring material and prepare the surface properly before proceeding with the tile installation.
3. When should I consider waterproofing the surface?
Waterproofing is particularly important in areas prone to moisture, such as showers or wet rooms. Applying a waterproofing membrane helps prevent water from penetrating the substrate, protecting it from potential damage. If you're installing tiles in a wet area, it's recommended to incorporate waterproofing measures.
4. How do I level a surface before tile installation?
To level a surface, you can use self-leveling underlayment for minor imperfections or a mortar bed for significant unevenness. Self-leveling underlayment is a popular choice as it creates a smooth and level substrate. Alternatively, a mortar bed can be used for larger areas or more substantial unevenness. Consult professionals or industry guidelines for the best approach.
5. Can I skip surface preparation steps?
It's not advisable to skip surface preparation steps as they are crucial for the success and longevity of your tile installation. Proper surface preparation ensures a secure bond, prevents future issues, and allows for a visually appealing finish. Taking the time to prepare the surface correctly will save you from potential headaches and problems down the line.